
Sound, as it exists in the air, is continuous — an unbroken stream of pressure changes that has a value at every infinitely small moment in time. A computer can’t store that. It needs numbers. The act of turning a continuous analog signal into a series of discrete numbers — and then turning those numbers back into sound — is what this chapter is about. Get it right and the conversion is transparent. Get it wrong and you hear artifacts that shouldn’t be there.
Analog to Digital: How It Works
An A/D converter (ADC) does one thing: it measures the voltage of the incoming analog signal at regular intervals and writes down each measurement as a number. That’s sampling. Two settings control the quality of the result.
Sample Rate
How many times per second the converter takes a measurement. 44,100 Hz (44.1 kHz) is CD standard — 44,100 snapshots every second. 48 kHz is the video/broadcast standard. 96 kHz and 192 kHz are “high-resolution” options.
For most recording, 48 kHz is the practical choice. It captures everything you can hear with a comfortable margin, it’s the native rate for video work, and it doesn’t eat twice the disk space and processing power that 96 kHz does. If you’re recording at 44.1 kHz, that’s fine too. The difference between 44.1 and 48 is audibly negligible. The difference between 48 and 96 is debatable even among professionals.
The Nyquist Frequency
Here’s the rule that governs all of digital audio: a digital system can accurately capture frequencies up to half the sample rate. That boundary is called the Nyquist frequency.
At 44.1 kHz, the Nyquist frequency is 22,050 Hz — above the top of human hearing. At 48 kHz, it’s 24 kHz. As long as the sample rate is at least double the highest frequency you want to capture, the math works and the reconstruction is perfect.
Frequencies above the Nyquist limit cause aliasing — they fold back into the audible range as harsh, metallic artifacts that sound nothing like the original. Every A/D converter includes an anti-aliasing filter that removes these frequencies before sampling. You never have to think about this — it happens automatically. But it’s why the Nyquist limit exists and why sample rate isn’t arbitrary.
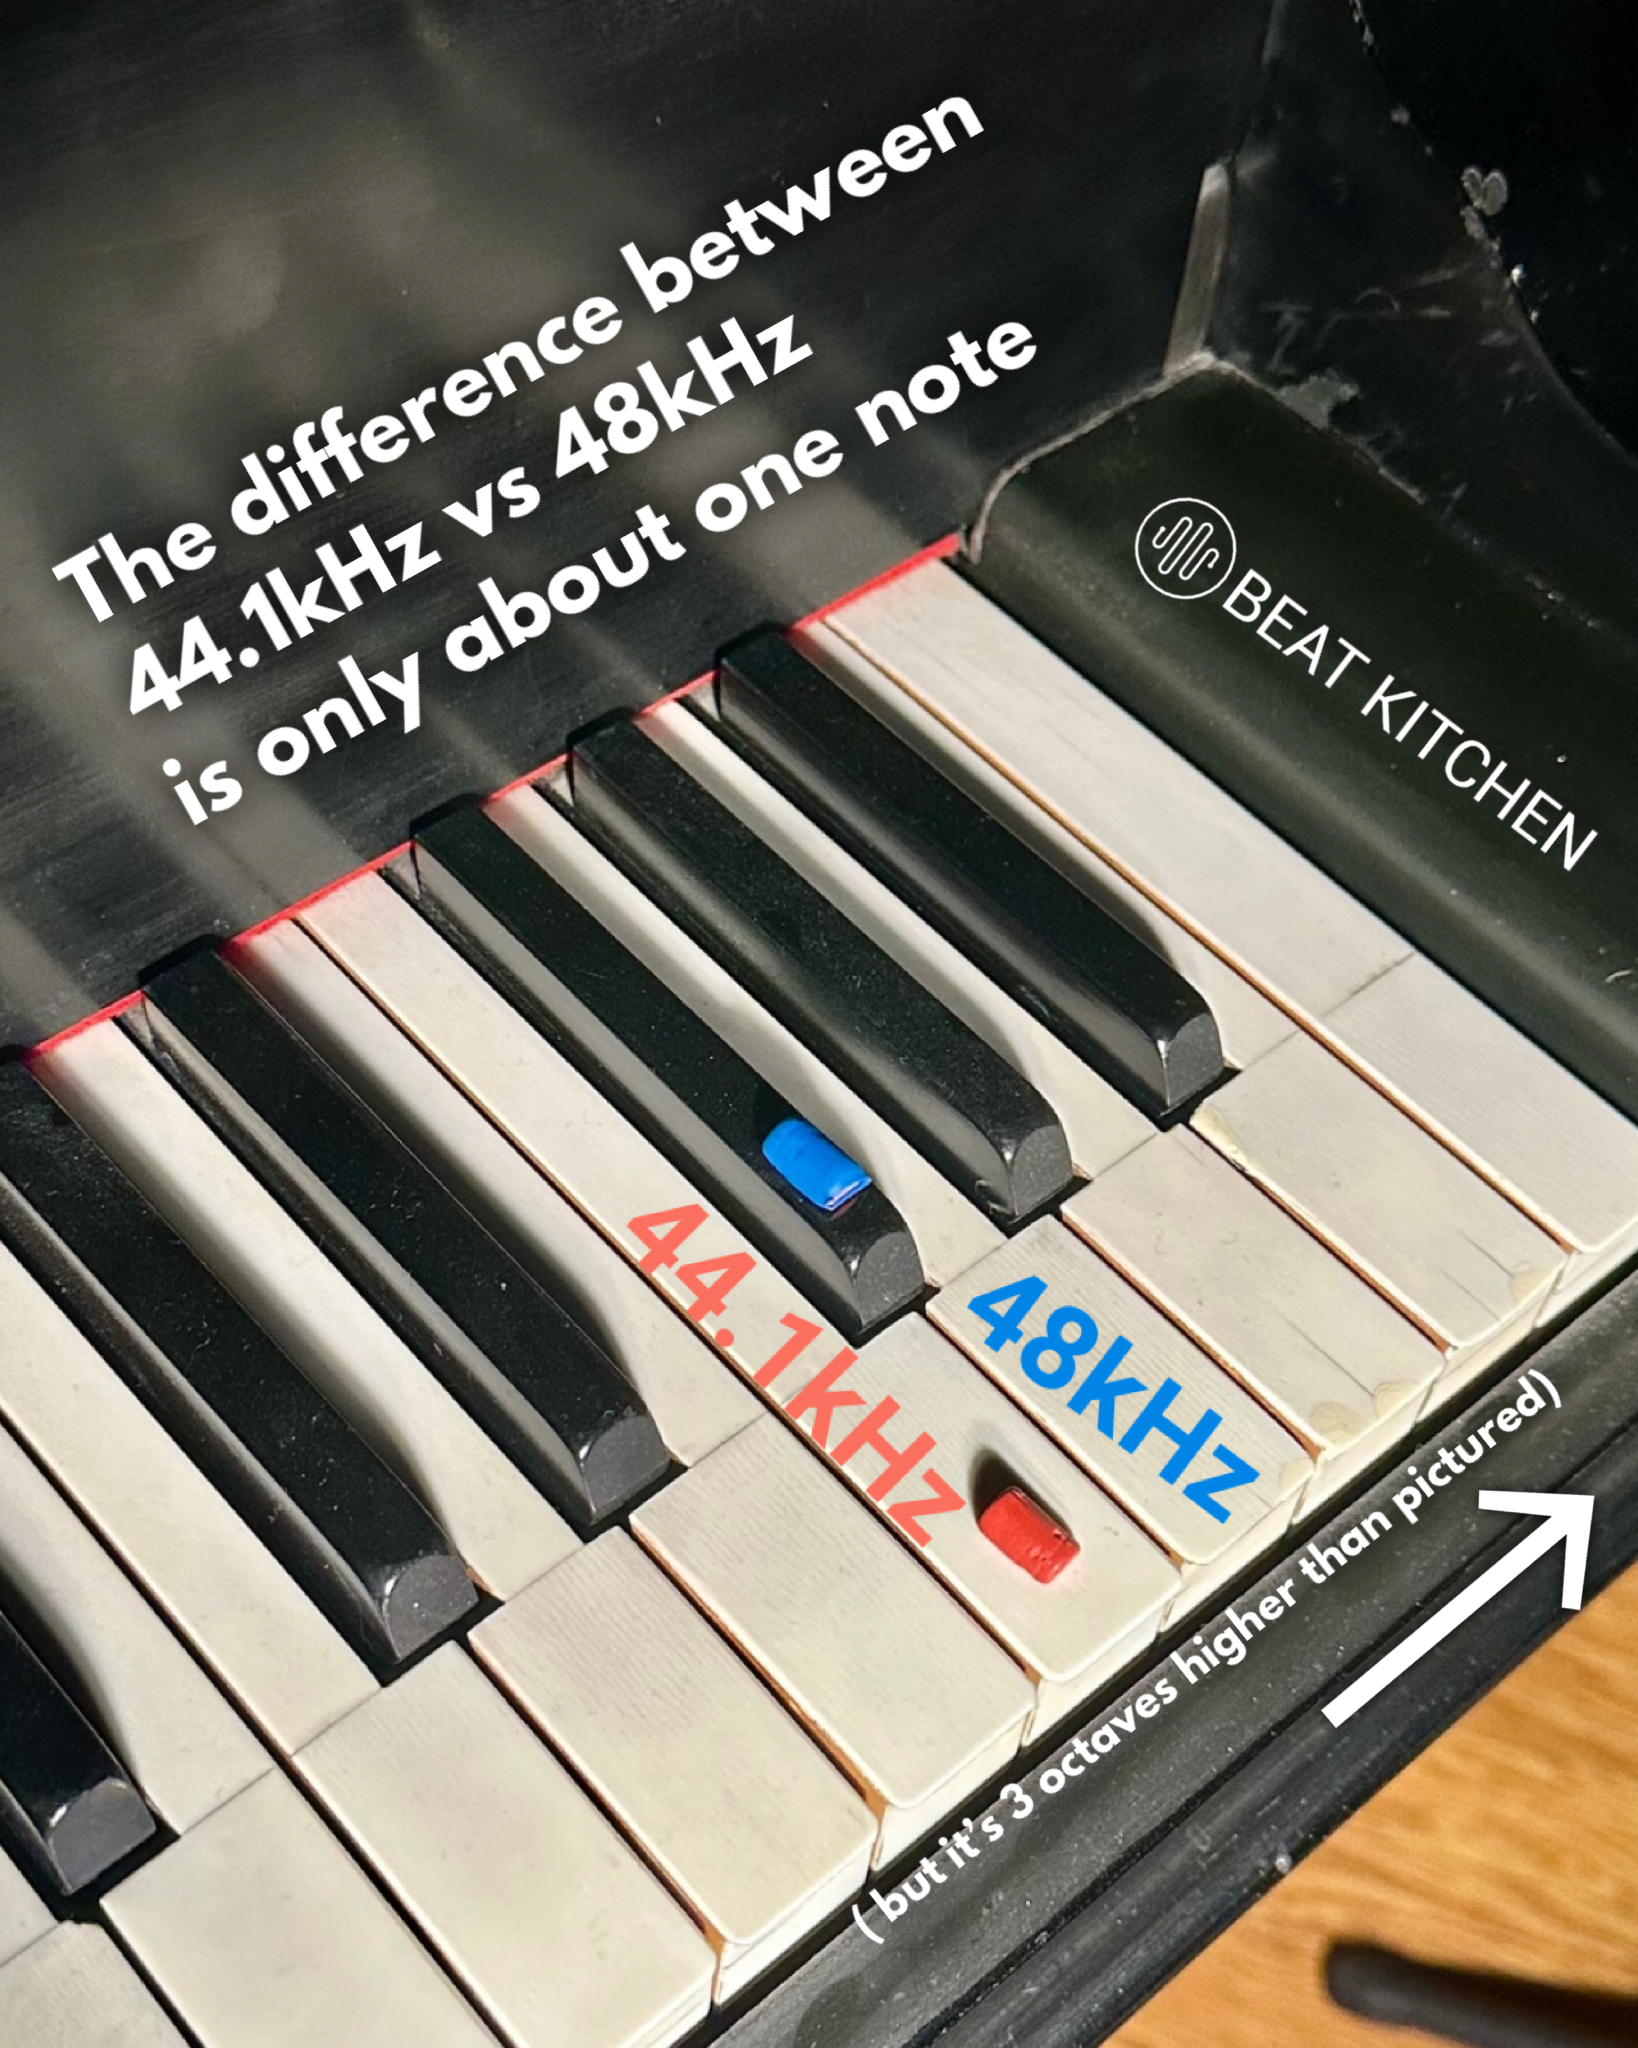
The difference between high sample rates and 44.1k probably isn’t as dramatic as you’d think. Going from 44.1 to 48 kHz? The Nyquist limit goes from 22,050 Hz to 24,000 Hz — a difference of about one note. Roughly F to F#, three octaves above the top octave of the piano. Both frequencies are already well above the ceiling of human hearing.
Doubling from 44.1 to 88.2 kHz gives you exactly one more octave of frequency content above that — still all of it inaudible. The debates about high sample rates are real, but they’re about converter filter behavior and processing math — not about capturing sounds you were missing.
Bit Depth
Each sample is stored as a number, and the bit depth determines how many possible values that number can take. More bits = finer resolution = more dynamic range between the quietest sound you can capture and the loudest.
- 16-bit: 65,536 possible values per sample. ~96 dB of dynamic range. CD quality. Adequate for finished masters.
- 24-bit: 16.7 million possible values. ~144 dB of dynamic range. The recording standard. This is what you should record at — no exceptions.
- 32-bit float: Effectively unlimited dynamic range within the digital domain. Used inside DAWs for processing math, rarely for actual recording.
32-bit float files are a professional standard, but they’re not THE professional standard. If you’re wondering if you should be using them, the answer is almost certainly “no.” 32-bit float is for storing information that won’t fit in a smaller 24-bit container — it’s useful when you’re combining tracks and the math gets bigger than 24 bits can hold. It’s not about sound quality, it’s about extra space. One notable exception: field recorders that capture 32-bit float give you effectively unclippable recordings — no matter how loud the source, you can scale it down later without distortion. That’s a headroom feature, not a resolution feature.
The jump from 16-bit to 24-bit is huge. It means you can record conservatively — peaks at -12 dBFS, plenty of headroom — and still have a signal that sits well above the noise floor. In the 16-bit era, you had to record hot because every bit of headroom you wasted cost you resolution at the quiet end. At 24-bit, that problem doesn’t exist. Record at comfortable levels and don’t worry about it.
Dither
When you reduce bit depth — say, from 24-bit to 16-bit for a CD master — the extra resolution gets chopped off. The values that don’t fit are truncated, and that truncation creates a predictable distortion pattern called quantization error. On quiet passages, it sounds like a gritty, buzzing distortion that follows the music.
Dither fixes this by adding a tiny amount of carefully shaped random noise before truncation. The noise randomizes the rounding errors, trading gritty distortion for a smooth, nearly inaudible noise floor. Adding noise to improve sound quality feels counterintuitive, but the math is clean and it works.
Dither matters only when you’re reducing bit depth — typically at the final mastering stage. If you’re recording and mixing at 24-bit (and you should be), you don’t need to think about dither until you’re ready to export a 16-bit master.
DC Offset
If the zero-point of your signal is shifted slightly above or below true zero, you have a DC offset — a constant voltage added to every sample. It wastes headroom, causes clicks at edit points, and at extreme levels can damage speakers. Most interfaces handle it automatically, and most DAWs have a one-click DC offset removal tool. It’s rarely a problem in practice, but it’s worth knowing the term when you encounter it.
Buffer Size and Latency
Your computer doesn’t process audio one sample at a time. It works in chunks called buffers. The buffer size determines the tradeoff between processing power and delay.
- Small buffer (64–128 samples): Low latency — roughly 3–6 ms of delay between making a sound and hearing it back. Essential for recording, because you need to hear yourself in near-real-time. But the CPU has less time to work per chunk, so you may hear clicks and pops if your session is plugin-heavy.
- Large buffer (512–2048 samples): Higher latency — 12–46 ms of delay. Fine for mixing, where you’re not monitoring a live input. Gives the CPU breathing room to run more plugins without glitching.
The practical workflow: small buffer when recording, large buffer when mixing. Switch it in your DAW’s audio settings. It takes two seconds.
Direct Monitoring
Some interfaces offer direct monitoring — routing the input signal straight to the headphones at the hardware level, bypassing the computer’s processing entirely. Zero-latency monitoring regardless of buffer size. The trade-off: you hear the dry, unprocessed signal. If you want to hear reverb or effects on your voice while recording, you need the signal to go through the computer, which means living with whatever latency the buffer introduces.
What to Practice
- Check your session settings. Open your DAW and find where sample rate and bit depth are set. Make sure you’re recording at 24-bit. Note your sample rate — 44.1 or 48 kHz are both fine, but be consistent. Changing sample rate mid-project creates problems.
- Feel latency. Set your buffer to 64 samples and record a vocal or handclap. Then set it to 2048 and do the same thing. Feel the delay? That’s latency. Find the smallest buffer size your system can handle without glitching — that’s your recording setting.
- Try direct monitoring. If your interface supports it, toggle direct monitoring on and record something. Then toggle it off and monitor through your DAW. Compare how they feel. Neither is wrong — they’re tools for different situations.
- Hear dither (advanced). Record a very quiet passage at 24-bit. Export it to 16-bit without dither — listen for the gritty artifacts on the tail of a reverb or the decay of a note. Now export again with dither enabled. The grit should be replaced by a smooth, quiet hiss. That’s dither doing its job.
Search This Guide
This Course
- 1. Sound, Electricity, and Transduction
- 2. Microphones: Types, Patterns, and Selection
- 3. Cables, Connectors, and Balanced Audio
- 4. The Audio Interface and Signal Levels
- 5. Digital Audio: Sampling, Bits, and Conversion
- 6. Recording in Mono
- 7. Working with Vocalists
- 8. Recording in Stereo
- 9. Mid/Side: Sum, Difference, and the Stereo Field
- 10. Recording Instruments
- 11. Speakers and Studio Monitors
- 12. Headphones and Monitoring
- 13. Studio Acoustics and Room Treatment
- 14. Metering, Levels, and Phase
- 15. Patchbays and Signal Routing
- 16. MIDI, Sync, and Networked Audio
- 17. Controllers and External Hardware
- 18. Cable Repair and Soldering
- 19. Session Planning and Workflow
- 20. Gear: What to Buy and When
- 21. Sources and Further Reading
Related Videos
Like what you're reading?
Everything in this guide is yours to keep. But reading about it isn't the same as hearing it, doing it, and having someone who's been at this for 30 years tell you why it matters in your music. This is one chapter of a live course — small group, cameras optional, taught by someone who gives a shit.
View the Hardware & Recording Primer Course →© 2026 Beat Kitchen School — beatkitchen.io. Licensed under CC BY-NC-SA 4.0. Free to share and adapt for non-commercial purposes with attribution.